First things first.... Try to start the engine.
This quickly established problem number one, the starter motor slipping out because of worn teeth on the flywheel as well as poor engagement from the starter motor.
So the first few jobs were to fix the starter motor clutch and refurb the starter motor. The flywheel was also set back by adding a shim to get better contact with the starter motor drive. Having sorted the starter motor, and temporarily fixed the flywheel, the next problem was the ignition system.
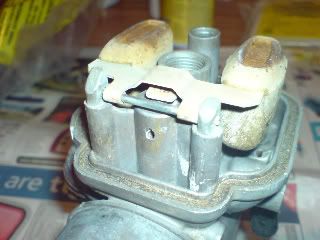
The engine originally had a CDI magnet ring type ignition. These produce a huge spark and don't require an alternator as they produce their own power. This had obviously broken and was replaced by the previous owner who made up a distributorless points ignition system working on the wasted spark principle (2 sparks per cylinder for every rotation). The home made ignition system produced a weak spark and made starting the engine very difficult. The previous owner had obviously had some major issues getting the engine/boat to work as when I looked at the cam/points cover (see pic) he had stamped the words "ABANDON ALL HOPE ALL YE WHO ENTER HERE" onto the inside of the cover. Amusing at the time but if i'd found it earlier, i'd probably have taken this excellent advice!
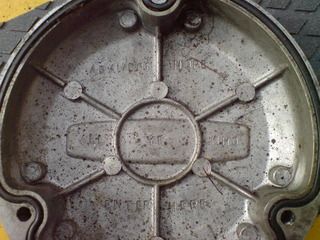
Hidden advice from the previous owner! Look closely...
Anyway, the chap who sold it to me suggested I strap a magneto ignition system to it, such as the types seen on old Mercury outboards. Not knowing any better, I took his advice. It involved tracking down the magneto off someone in Wales, making a bracket and toothed pulley belt system, and the necessay adjustment holes etc. IT WORKED. It fired up nicely and was running much better however the system was eventually ditched because the bracket holding the magneto to the engine vibrated to the point that you could barely see the magneto as it attempted to destroy itself. So I removed the magneto and the bracket and started again. This time it was back to points, except I used the points as a trigger for a home made electronic ignition system which I soldered up from a Maplin kit. I hoped this would help give a better spark in combination with a new coil. The points system failed to generate a good spark however despite using new plugs (the correct ones this time), new leads, and the electronic box coupled to the new coil. I got the thing to start a couple of times but it really was hard work to start. I then made the mistake of coaxing the thing into life using "Easy Start" which led to one of the piston rings going on holiday via the exhaust pipe. This meant an engine rebuild, so i sourced new pistons and rings, gaskets etc from Andover Norton (Rotax Suppliers) and set to. I also stripped the carb and found that some parts were missing altogether and the main needle very badly worn.
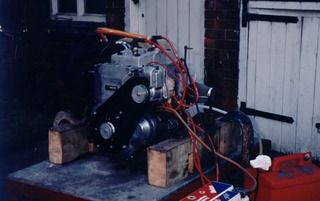
The Rotax engine in its early days with Mk1 ignition system - later ditched due to bad vibration
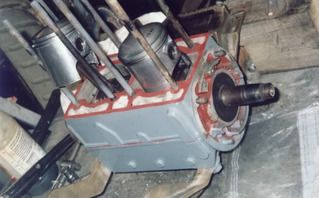
Engine rebuild in progress - NEVER USE EASY START ON OLD ENGINES!!!
So with the engine rebuilt, it was time to fit an ignition system that actually worked, and sort the carb. I ordered an MSD ignition system designed specifically for small watercraft. The MSD system has modern trigger pickups to trigger the sparks via 2 coils, as well as digital timing control allowing the ignition to be retarded at start up for easy starts, and advanced at higher revs to give more power. It also has a rev limiter to prevent engine damage at high revs. The ignition computer also sends multiple sparks (MSD = Multiple Spark Discharge) to each spark plug below 3000rpm, improving the idle and start. To fit the MSD igntion to this custom application I had to have a mounting plate fabricated to seat the trigger pickups. I also at this point decided to have a new flywheel made up as the old flywheel had worn teeth and was way out of balance, causing the engine to vibrate. I designed a heavier flywheel to aid starting and to give a nice smooth performing engine. The trigger plate and flywheel were fabricated by TTV Racing who did a great job and were very helpful.
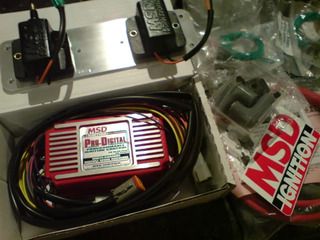
New MSD digital programmable ignition system
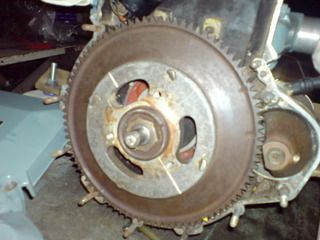
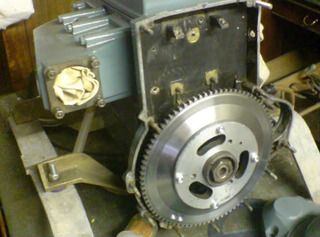
Old mangled and off balance flywheel
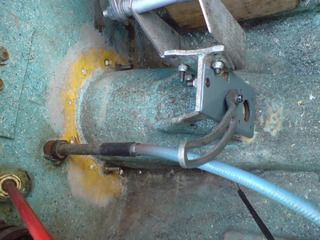
 Rebuilt engine with custom made flywheel following "Easy Start" disaster. A magnetic trigger is installed on the rear face of the flywheel to trigger the ignition sparks
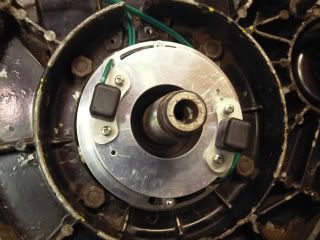 Custom made trigger pickup mounting plate and twin trigger pickups. These control the twin coil packs
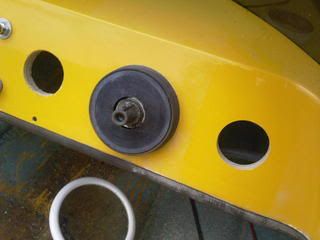
 With new exhaust header and ignition cover (from a Kawasaki)
With the ignition system sorted, it was time to sort the carb. I ordered a full set of replacement parts from a very helpful and top bloke called Ralph Engelbrecht, a specialist from Germany with a good supply of BING carb parts. I also discovered the fuel pump wasn't working properly, and ordered a replacement.
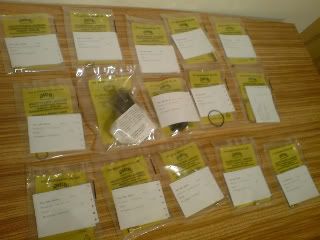 New parts from BING carburettors - They have lots of old spares in stock!
Old carb float being removed
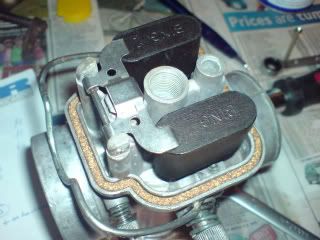 New float being fitted to carb - also fitted new jets, needles, and missing parts!
The engine then went into the boat and all the wiring for the new ignition system was connected up using waterproof Perma Seal connectors and Deutsch connectors. I replaced the fuel lines and fitted new in-line fuel filters. The engine fired up first time and now provides reliable first time starts every time and runs beautifully. Well worth the money and time for the ignition and carb parts.
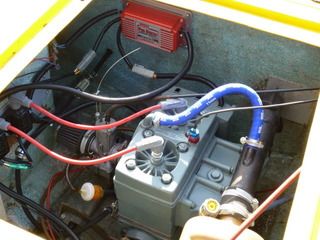
Everything in place and wiring done